Gradle是一个基于Apache Ant和Apache Maven概念的项目自动化构建工具。它使用一种基于Groovy的特定领域语言(DSL)来声明项目设置,抛弃了基于XML的各种繁琐配置。面向Java应用为主。当前其支持的语言限于Java、Groovy、Kotlin和Scala,计划未来将支持更多的语言。官方发布站点。
最新的8版本
最新的7版本为:7.3.3
最新的6版本为:6.9.2
最新的5版本为:5.6.4
注意:每个版本的配置内容有差异。
环境准备
打开官方网站:https://gradle.org/releases/ 下载对应的版本包,例如gradle-6.8.3-bin.zip
在 Windows 中配置 gradle,解压到指定目录(e.g. C:\Users\ducha\Program),然后添加到PATH中,然后大搞终端执行命令 gradle -v
在 Linux 中配置 gradle, 一般我们解压到 /opt 目录中,然后添加环境变量
添加环境变量:
[root@node7 bin]# vim /etc/profile
export PATH=$PATH:/opt/gradle-4.4/bin
[root@node7 bin]# source /etc/profile
[root@node7 bin]# gradle -v
gradle wrapper
The Gradle wrapper allows us to run a build with a specified version and settings without the Gradle installation. This wrapper can be considered as a batch script on Windows and shell script for other OS. When we invoke the Gradle with the wrapper, it automatically downloads and builds the specified version.
配置gradle-wrapper.properties
# gradle/wrapper/gradle-wrapper.properties

distributionBase=GRADLE_USER_HOME
distributionPath=wrapper/dists
distributionUrl=https\://services.gradle.org/distributions/gradle-5.6.4-bin.zip
zipStoreBase=GRADLE_USER_HOME
zipStorePath=wrapper/dists
配置gradle.properties
build.gradle 中用到的变量,以及gradle的jvm参数。
grailsVersion=4.0.4
gormVersion=7.0.4
gradleWrapperVersion=5.6.4
gebVersion=2.3
seleniumVersion=3.12.0
webdriverBinariesVersion=1.4
hibernateCoreVersion=5.1.5.Final
chromeDriverVersion=2.44
geckodriverVersion=0.23.0
seleniumSafariDriverVersion=3.14.0
org.gradle.jvmargs=-Xms512M -Xmx4g -XX:MaxPermSize=1024m -XX:MaxMetaspaceSize=1g -Dkotlin.daemon.jvm.options="-Xmx1g"
简单的开始
apply plugin: ‘groovy’
apply plugin: ‘idea’
version = ‘0.0.1’
group = ‘cn.duchaoqun’
repositories {
maven { url ‘https://maven.aliyun.com/repository/gradle-plugin’ }
maven { url ‘https://maven.aliyun.com/repository/google’ }
maven { url ‘http://maven.aliyun.com/nexus/content/groups/public/’ }
maven { url ‘https://maven.aliyun.com/repository/jcenter’ }
mavenCentral()
}
dependencies {
implementation ‘org.codehaus.groovy:groovy-all:2.4.15’
compile group: ‘com.alibaba’, name: ‘easyexcel’, version: ‘2.2.7’
}
配置文件 build.gradle
buildscript 区域
该区域中有 repositories、dependencies 配置,标识 gradle 脚本自身需要使用的资源。 而在build.gradle文件中直接声明的依赖项、仓库地址等信息是项目自身需要的资源。
- All buildscript {} blocks must appear before any plugins {} blocks in the script
buildscript {
    repositories {
        mavenLocal()
        maven { url "https://repo.grails.org/grails/core" }
    }
    dependencies {
        classpath "org.grails:grails-gradle-plugin:$grailsVersion"
        classpath "org.grails.plugins:hibernate5:${gormVersion - ".RELEASE"}"
        classpath "com.bertramlabs.plugins:asset-pipeline-gradle:2.15.1"
    }
}
基本属性 区域
//
version "0.0.1"

group "cn.duchaoqun"

sourceCompatibility = JavaVersion.VERSION_1_8
targetCompatibility = JavaVersion.VERSION_1_8

//sourceCompatibility属性跟编译环境有关,而targetCompatibility属性跟运行环境有关。
//代码用的语言特性对应的JavaVersion
//≦ sourceCompatibility
//≦ targetCompatibility
//≦ Gradle使用的JavaVersion
//≦ 客户端环境的JavaVersion
plugin 区域
Gradle是一个通用的构建工具,通过它的构建脚本你可以构建任何你想要实现的东西,不过前提是你需要先写好构建脚本的代码。而大部分的项目,它们的构建流程基本是一样的,我们不必为每一个工程都编写它的构建代码,因为Gradle已经为我们提供了相应的插件。Gradle 本身自带了许多插件,而对于Gradle没有的插件,可以去github上看看有没有其他人实现,或自己实现。对Java项目而言,Gradle有Java插件,提供了像编译、测试、打包之类的功能。这里简单介绍一下Java插件。Java插件为构建项目定义了许多的默认设置,像源文件目录,编译后的文件存放位置等等。如果你是按着默认的规则来的,那么构建脚本将会很简单。当然,如果项目结构不一样,也可以自己指定这些规则。这里暂不介绍,只说一下基本的用法。
apply plugin: "groovy"
apply plugin: "eclipse"
apply plugin: "idea"
apply plugin: "war"
apply plugin: "org.grails.grails-web"
apply plugin: "asset-pipeline"
apply plugin: "org.grails.grails-gsp"
/*
使用JAVA插件,定义一个Java项目只需要添加这么一句代码,它会为你添加Java插件,以及一些内置任务。
默认情况下,Gradle会在
src/main/java中查找你的源码,
src/test/java中查找你的测试代码,
src/main/resources下的文件都会被打包,
src/test/resources下的文件会被包含在classpath中用于测试。
所有输出的文件都保存在build目录里,而生成的jar包则是在build/libs里面。
*/
apply plugin: 'java'
repositories 区域
配置在线仓库
不同于 buildscript 区域中的配置,这里配置的是项目内容所需要的仓库地址,告诉Gradle在哪里可以找到这些依赖。当访问官方源太慢的时候,可以配置成国内的源地址,尽量不使用https, If there are something wrong with https, change to http. If you can find a jar at this repository, change to another one.
repositories {
    // 本地仓库
    mavenLocal()
    // 在线仓库
    maven { url 'https://maven.aliyun.com/repository/public/' }
    maven { url "https://repo.grails.org/grails/core" }
    // 中央仓库,可以放在国内源之后
    mavenCentral()
    // 其他仓库
    maven { url "https://jcenter.bintray.com" }
    maven { url 'https://maven.aliyun.com/repository/jcenter'}
    maven { url 'https://maven.aliyun.com/repository/gradle-plugin' }
    maven { url 'https://maven.aliyun.com/repository/google' }
    maven { url 'https://maven.aliyun.com/nexus/content/groups/public' }
    maven { url 'https://maven.aliyun.com/repository/jcenter' }
    maven { url 'https://repo.spring.io/snapshot' }
    maven { url 'https://repo.spring.io/milestone' }
}
引用本地的jar包
- 修改build.gradle文件,不是kts后缀的文件,kts是为Kotlin脚本,基本用于Android开发配置。
- 项目根目录创建lib目录,然后将jar放到该目录中,添加如下信息。
- 测试环境:micronaut 4.1.2 gradle 8.4
repositories {
    flatDir{
        dirs 'libs'
    }
}
dependencies {
    implementation name: 'sdk-java-3.3.3'
    implementation name: 'bsApi-3.6.1-shaded'
    implementation name: 'sdk-java-3.3.9'
}
dependencies 区域
不同于 buildscript 区域中的配置,这里配置的是项目内容所需要的依赖信息 留意版本上的 + 号,它会在编译的时候找到最新的包 如果需要升级框架本身所依赖的包就直接在这里定义即可
dependencies {
    // compile 阶段需要使用的依赖,如下两种写法都可以。
    implementation "org.springframework.boot:spring-boot-starter-logging"
    implementation group: 'commons-collections', name: 'commons-collections', version: '3.2'
    // runtime 阶段需要使用到的依赖。
    runtime "com.bertramlabs.plugins:asset-pipeline-grails:2.15.+"
    testCompile "org.grails:grails-web-testing-support"
    testRuntime "net.sourceforge.htmlunit:htmlunit:2.+"
    // 第三方jar包的一种添加方式
    compile fileTree(dir: 'libs', include: '*.jar')
}
implementation
编译阶段所依赖的库,早期的 Gradle 使用 compile 字符
configurations 区域
可以去掉重复的引用
configurations.all {
exclude module: ‘slf4j-log4j12’
}
configurations {
all*.exclude group: ‘org.apache.poi’, module: ‘poi:3.9’
}
bootRun 区域
bootRun {
jvmArgs(‘-Dspring.output.ansi.enabled=always’)
jvmArgs(‘-Xmx4096m’)
addResources = true
String springProfilesActive = ‘spring.profiles.active’
systemProperty springProfilesActive, System.getProperty(springProfilesActive)
}
grails 区域?
不知道这是不是 gradle 的标准配置,尚未深入了解。
在 Windows 终端启动 grails 程序的时候,会因为文件或者命令太长导致启动失败,配置上这个就好了。
grails {
    pathingJar = true
}
assets 区域?
assets {
minifyJs = true
minifyCss = true
}
Copy
发布JAR包
以下代码是发布JAR包到本地中。发布到maven仓库或jcenter仓库以后再讨论。
uploadArchives {
    repositories {
      flatDir {
          dirs 'repos'
      }
    }
}
执行gradle uploadArchives即可发布该JAR包。
jar 包过大
当包太大或者文件数量超过65535的时候,打assemble包失败,需要设置如下内容。
shadowJar{
zip64 true
}
使用代理
Windows上的文件目录:C:\Users\DU.gradle\gradle.properties
systemProp.socks.proxyHost=localhost
systemProp.socks.proxyPort=1080
四、配置文件gradle.properties
目标网站使用TLSv1.3的时候,需要如下配置,否则不能链接目标仓库
The server may not support the client's requested TLS protocol versions: (TLSv1.2, TLSv1.3).参考网站: https://docs.gradle.org/6.8.3/userguide/build_environment.html#gradle_system_properties
https.protocols = 'TLSv1.3'常用的包
// Apache的工具包
compile group: 'commons-codec', name: 'commons-codec', version: '1.15'
compile group: 'commons-io', name: 'commons-io', version: '2.8.0'
// 解析JSON
implementation group: 'com.alibaba', name: 'fastjson', version: '1.2.75'
// 谷歌二维码
compile group: 'com.google.zxing', name: 'core', version: '3.4.0'
compile group: 'com.google.zxing', name: 'javase', version: '3.4.0'
// 阿里云OSS
compile group: 'com.aliyun.oss', name: 'aliyun-sdk-oss', version: '3.11.1'
// PG驱动
runtimeOnly "org.postgresql:postgresql"
// MySQL驱动
implementation 'mysql:mysql-connector-java:8.0.33'
// Spring framework start auto while the source file changed.
developmentOnly "org.springframework.boot:spring-boot-devtools"
常用命令
gradle eclipse  # 构建开发环境,下载定义的jar包
# 编译项目,生成build文件夹,并生成相应的jar或war包。
gradle build

# 删除build目录和其他构建时生成的文件。
gradle clean

# 编译并打包,不执行单元测试。一些其他插件可能会增强这个任务,如 War 插件会再打出war包。
gradlew assemble

# 编译并测试代码。其他插件可能会增强这个任务。如 Code-quality 插件会让这个任务去执行Checkstyle。
gradlew check
处理依赖
可以直接使用IDEA的Gradle快速查看出所有的依赖,然后再结果窗口找到对应的依赖jar,是排除还是更新。
你要时刻注意:log4j-core 和 log4j-api 不是一个包哈,有的时候包头脑混乱的时候会混淆。
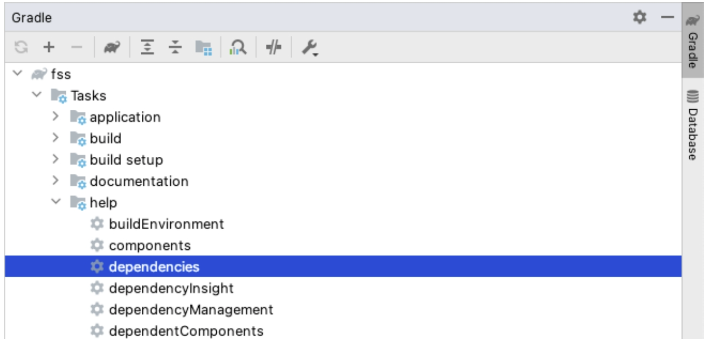
./gradlew -q dependencies # 查询项目的所有依赖内容
同时有 2.17.2 和 2.7 ? 现在使用的是哪个?还是都在使用?
+--- org.apache.logging.log4j:log4j-core:2.17.2
| --- org.apache.logging.log4j:log4j-api:2.17.2 → 2.7
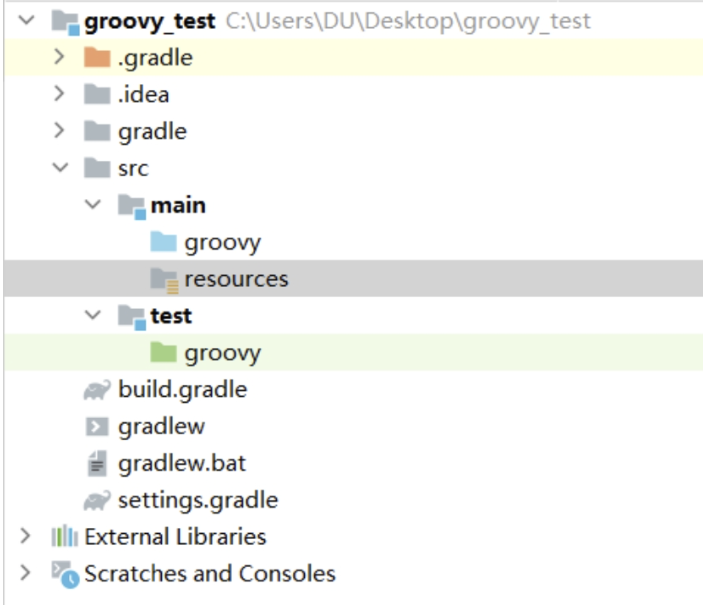
项目结构
常见问题
在使用IDEA作为开发环境里的时候,导入Gradle的项目,因为不同的配置环境,可能回下载指定版本的Gradle,有的时候可能因为网络等问题导致下载失败,这时我们就需要删除临时的文件,重新下载或者手动下载。 Could not install Gradle distribution from ‘https://services.gradle.org/distributions/gradle-5.6.4-bin.zip’. The cached zip file /Users/dcq/.gradle/wrapper/dists/gradle-5.6.4-bin/bxirm19lnfz6nurbatndyydux/gradle-5.6.4-bin.zip may be corrupted.
IDEA下载gradle的时候下载不下载,可以使用手动的方式进行下载,然后在IDEA中更新Gradle环境即可,Windows系统放置到如下目录中: C:\Users\Administrator.gradle\wrapper\dists\gradle-7.2-bin\2dnblmf4td7x66yl1d74lt32g